How to submit a job to COSMIC²
After uploading your data with Globus, you are now ready to submit your cryo-EM jobs to COSMIC².
Please be aware that there are limits to the amount of available processing time for users who do not have their own XSEDE allocation. Read more about computing allocations for COSMIC² users here.
Tutorial video:
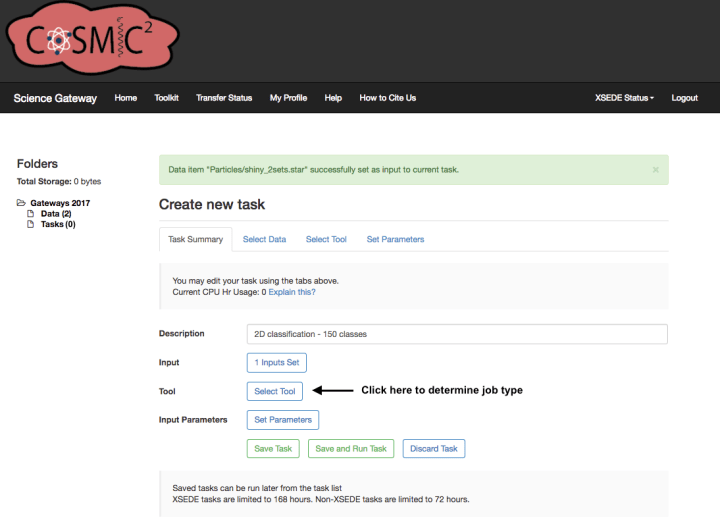
1. Navigate to Tasks sub-directory for your project folder
Click on ‘Create New Task’
2. Provide description of job
3. Select input data
Then select dataset from data upload page:
4. Specify job type
Select from list of available software:
5. Set job parameters
Specify for all parameters listed. For all parameters shown, clicking on the parameter title will bring you to additional information.
NOTE: Advanced options are hidden by default and can be accessed by clicked ‘Advanced Parameters’.
6. Submit job by clicking ‘Save and Run Task’:
This will bring up a warning window, asking you to confirm the job submission:
7. Monitor job status from ‘Task’ sub-directory overview page
8. Detailed job status page
This page will display information such as input data & job parameters, as well providing information about the status of your job on the supercomputer:
Task messages for an example job that was submitted:
Important: Look for the status update of ‘Submitted’ to know when the job has made it to the supercomputer.
9. Monitor job progress
You can monitor the job progress by clicking on the ‘Intermediate Results’ link for the detailed job description page. This will show a listing of the current directory on the supercomputer:
The job status can be monitored in the stdout.txt file. After downloading, you can open up to view the latest information:
You will also receive an email confirming the start time of your job on the supercomputer (as well as when the job terminates):
10. Job completion
Once the job completes, you will 1) receive an email confirming that the job finished and 2) be able to view the final output log file, as well as download the results.
Example status page for completed job:
Example ‘Task Message’ output listing:
11. Task output
The output results can be viewed by selecting the ‘View’ link next to output in the job description page. This will open a new page:
To view the output log file, click ‘view’ next to the STDOUT file:
Finally, to download results, click the download link for relion_output. This will download a .zip file that you can unzip to view the results.


